Maintenance Tips for Your Door Closer
Maintenance Tips for Your Door Closer
We have all been startled by that bone-rattling thud echoing down the hallway when someone simply walks into a room. Instead of wondering, “why is my door slamming shut,” you can easily take control of the situation with a standard flathead screwdriver. That heavy metal box mounted at the top of your frame isn’t a mysterious piece of commercial machinery. According to hardware professionals, most common door frustrations require just five minutes and a sturdy step stool to permanently resolve.
Inside that automatic door closer lies a very basic fluid system that uses hydraulic resistance to control how fast the door moves. Think of the tiny adjustment screws on the outside exactly like the hot and cold handles on your kitchen faucet. Turning the screw clockwise—remembering the golden “righty-tighty” rule—tightens the internal valve and restricts the flow of oil, instantly slowing down the swinging motion. In practice, building maintenance experts rely on these small, incremental tweaks to prevent long-term hardware damage caused by constant heavy impacts against the frame.
A properly working door seems to shift gears right before it completely closes. Every standard closer actually operates in two distinct stages: the Sweep Speed, which handles the first eighty percent of the wide closing arc, and the Latch Speed, which provides that final, gentle nudge to click the lock into place. Mastering your door closer adjustment means balancing these two separate valves until you achieve a silent, secure close. You want the heavy panel to shut quickly enough to keep drafts out, but softly enough to spare your nerves.
One crucial safety rule stands between a successful repair and a major headache: never unscrew the adjustment valves completely. Backing the screw out entirely is exactly like pulling the drain plug out of a full bathtub. The internal oil will immediately leak everywhere, permanently ruining the device. By sticking to tiny, fractional turns—like moving the screw slot from 12 o’clock to 1 o’clock on a clock face—you can easily and safely master this everyday fix.

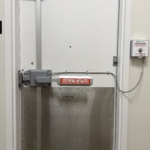
Door Closer
The Anatomy of an Automatic Door Closer: Pneumatic vs. Hydraulic
Before grabbing tools, identify what kind of hardware you are actually adjusting. Heavy-duty doors typically rely on oil-filled models built to ANSI grade 1 door hardware standards, meaning they are tough enough to survive millions of swings without leaking or breaking.
Spotting the difference between pneumatic vs hydraulic door closers comes down to three physical traits:
- Shape: Air-powered (pneumatic) closers look like thin cylinders, whereas oil-filled (hydraulic) models are thick, rectangular metal boxes.
- Size: Hydraulic closers are significantly larger and heavier than lightweight pneumatic tubes.
- Mounting style: Surface-mounted units bolt externally right onto the door, while concealed models are completely hidden inside the top frame.
Tool selection directly depends on this quick visual check. Basic air closers often just need your fingers to twist a dial, but robust hydraulic boxes require a flathead or Phillips screwdriver. With the right tool in hand and your hardware identified, you are ready to locate the appropriate adjustment valves.
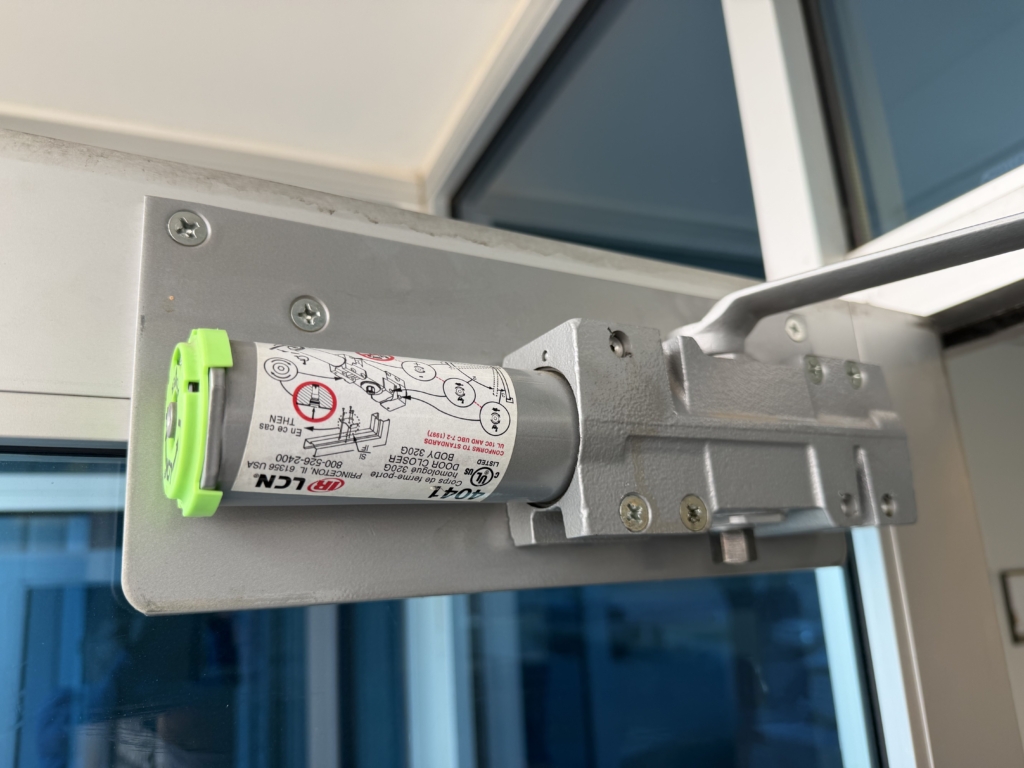
Finding the Magic Screws: Locating S, L, and BC Valves
Once at eye level with the heavy metal box, gently slide or snap off its decorative cover to reveal the mechanics underneath. Before attempting any door closer adjustment, grab a screwdriver that perfectly fits the slots. Using an undersized tool strips the soft metal, permanently trapping the valves.
Looking closely at the exposed side, you will find tiny stamped letters next to each screw. To successfully regulate commercial door closing speed, simply decode these manufacturer abbreviations. The letter “S” stands for Sweep, managing the door’s pace for most of its journey. Right beside it sits the “L” for Latch, which controls that final tiny push needed to securely click the lock without a loud bang.
A third screw labeled “BC” might also be present, acting as a built-in shock absorber. Proper backcheck valve function and setting prevents damage if a strong breeze or rushing coworker violently throws the door backward into your drywall. Now that you know exactly which screw controls which movement, you are fully equipped to begin adjusting the primary sweep speed.
Mastering the 80% Rule: Adjusting the Sweep Speed
Holding heavy groceries while waiting for a door to inch shut allows expensive air conditioning to escape. The sweep speed controls the first 80 percent of the door’s movement, and a safe, convenient setting requires about a five-second swing from fully open to just inches away from the frame.
To achieve this timing and regulate commercial door closing speed, treat the “S” valve like a sensitive water faucet. Turning the screw clockwise tightens the flow of internal oil, smoothly slowing the door down. To understand how to increase door closing tension for a noticeably faster swing, simply turn the screw counter-clockwise.
The biggest mistake during any door closer adjustment is turning the screwdriver too much at once. Think of the screw like a clock’s minute hand, and only adjust roughly a 1/8th turn before physically testing the door again. Remember the golden rule: never unscrew the valve completely, or the pressurized fluid will leak and permanently ruin the device.
Once you count a consistent, five-second glide, your sweep setting is completely fixed. You might notice, however, that while the main swing is perfect, the door still violently bangs against the frame at the very end. This indicates the latch speed requires fine-tuning.
The Final Inch: Fine-Tuning Latch Speed for a Silent Click
That bone-rattling thud at the end of the swing explains why people constantly ask, “why is my door slamming shut?” While sweep covers the main journey, the latch range handles the crucial final inches. The key to adjusting latch speed vs sweep speed is providing just enough momentum to overcome small-room air pressure. Too fast equals a noisy slam; too slow causes a frustrating “double-bounce” where the door hits the frame but fails to securely click into the lock.
Locate the “L” screw to tame this final gap. Make tiny 1/8th clockwise turns to gently reduce the latching force. Keeping the screw securely seated prevents blowout leaks that permanently ruin the hardware.
After achieving that smooth, satisfying “silent click,” verify your security using the simple Paper Test:
- Hold a piece of paper over the door frame’s strike plate.
- Let the door close naturally on its own.
- Tug the paper gently; if it is trapped tight, your adjustment is perfect!
With the closing process flawless, securing the opening phase ensures comprehensive door control.
Protecting Your Drywall: How to Set the Backcheck Valve
Imagine a sudden wind gust catches your heavy front door, throwing it open with terrifying speed. To learn how to stop a door from hitting a wall and leaving a massive dent in your drywall, you need to understand hydraulic braking. This feature acts like a protective shock absorber, preventing violent crashes into the surrounding structure.
Look at the hardware from your initial door closer installation to find a third screw, typically labeled “BC.” The backcheck valve function and setting create an invisible cushion of resistance that activates right around 75 degrees of the opening swing. Turn this screw clockwise slightly to firm up that protective cushion.
Remember that this fluid-based brake merely slows down a fast-moving door; it is not designed to replace a physical floor stop. Once you dial in the perfect amount of bounce to protect your walls, carrying groceries through the doorway might still feel like a race against time. For environments needing a longer open phase, adjusting the delayed action valve provides an elegant solution.
Delayed Action: Why Accessibility Matters for Your Entryway
Dragging a stroller or heavy boxes through a fast-closing entryway is a common frustration. Some hardware models feature a brilliant built-in solution called a Delayed Action (DA) valve, which acts like a polite doorman. Instead of immediately swinging back the moment you let go, this hydraulic setting holds the door wide open for an extended pause before the standard sweep speed takes over.
Business owners and caregivers rely on this feature because meeting ADA compliant door opening force requirements means giving people enough time to maneuver safely. By turning the “DA” screw slightly clockwise, you can increase the open time to a generous 20 to 30 seconds. This simple tweak delivers the everyday convenience of an expensive automatic door closer, creating a highly accessible environment without requiring any specialized electrical wiring.
Finding the right balance on this little screw showcases the true delayed action valve benefits for accessibility. However, dialing in that perfect hydraulic pause won’t solve everything if the initial physical push remains overwhelmingly stiff. Troubleshooting the internal spring tension ensures the entrance is comfortable for everyone.

The Heavy Door Struggle: Adjusting Spring Tension for Ease of Use
Does your entryway fight you when you pull the handle? While hydraulic valves control the closing speed, a large internal spring dictates the initial physical effort required to push the door open. To meet ADA compliant door opening force requirements, this resistance shouldn’t exceed five pounds of pressure (Lbf). If it takes more effort to push your door open than it does to slide a five-pound bag of flour across a kitchen counter, the spring is wound too tightly.
Fixing this resistance requires tweaking the tension nut located on the end of the closer body. If heavy outdoor winds constantly blow the entrance open, you can learn how to increase door closing tension by turning this nut clockwise to stiffen the resistance. Conversely, turning it counterclockwise relaxes the spring, easily counteracting internal building pressure to ensure a much lighter push for children and seniors.
Eventually, hardware simply wears out. When troubleshooting heavy glass door hinges that persistently sag, you may realize the internal coil has lost its physical “memory” and requires complete replacement. However, if that metal box is suddenly dripping a slippery, greasy mess, adjusting the spring will not save the hardware.
Troubleshooting the ‘Black Leak’: When Adjustment Isn’t Enough
Sometimes, a sudden slamming door isn’t an adjustment issue at all. Inside that metal box is oil, and its thickness—known as hydraulic fluid viscosity—creates internal resistance. This slows the door down much like a spoon moving through thick honey.
When the internal rubber gaskets degrade, you experience a permanent seal failure, letting that essential fluid escape. Unfortunately, fixing hydraulic door closer leak problems isn’t possible with duct tape or “miracle” patch kits. You will know it is time to completely replace the unit when you spot these three signs of a blown seal:
- A fine oil spray across the upper door frame.
- Complete loss of closing control, causing dangerous, unpredictable slams.
- Visible dark fluid dripping or pooling on your floor.
Don’t waste money trying to plug the hole; replacing the entire metal box is the only safe way to prevent permanent oil stains on your carpets. With a fresh unit installed, regular maintenance extends the lifespan of the linkage and hinges.
Maintaining the Skeleton: Arm Linkage and Hinge Care
While fluid acts as the muscle, the connecting metal arms serve as the skeleton—the linkage assembly. Routine step by step overhead closer maintenance requires checking these physical connections. Inspect the bracket screws carefully to spot loose mounting bolts early before they wiggle around and strip the door frame completely.
Annoying squeaks usually come from a dry or loose joint. Apply a single drop of household oil to the arm’s “elbow” for silent operation. Next, find the main arm nut—the large bolt directly attaching the arm to the metal box. Firmly tightening this with a basic wrench is the easiest secret to repairing door closer arm linkage issues and stopping sharp clicking sounds.
Ultimately, your door hinges determine how smoothly the entire system operates. A sagging frame forces your closer to constantly fight gravity. Troubleshooting heavy glass door hinges often reveals simple alignment problems rather than broken mechanisms. Massive glass panes and high-traffic entrances demand unique maintenance approaches.
Specialized Care for Heavy Glass Doors and High-Traffic Entrances
Hearing a heavy glass storefront door scrape the metal frame makes any shop owner cringe. This grinding noise usually points to “hinge drag,” where the sheer weight of the glass pulls the door out of alignment. When troubleshooting heavy glass door hinges, the closer itself is often perfectly fine, but a sagging frame forces the hydraulic box to overwork. Simply tightening the top hinge screws usually lifts the door enough to stop the scraping.
Busy office entryways present an entirely different challenge since constant daily movement alters the original factory settings. As coworkers push through, the tiny hydraulic valves experience constant vibrations. Over hundreds of swings, these screws slowly vibrate loose, letting oil flow too quickly and creating a startling bang.
Tall buildings also create an invisible hurdle called “stack pressure,” which acts like a stubborn wall of wind pushing against your entryway. To regulate commercial door closing speed against this invisible barrier, locate the “L” (Latch) valve and give it a tiny 1/8th turn left. Opening this valve slightly gives the door enough final momentum to push through the wind and click securely locked.
Weather brings its own frustrating surprises to these hard-working entrances. Since the fluid inside reacts to temperature—turning thick like syrup in winter and thin in summer—a perfectly tuned summer door might barely budge in December. A quick seasonal hardware check prevents these weather-related headaches.
Your Seasonal Door Maintenance Action Plan
That heavy metal box above your door is no longer a frustrating mystery. You now have the skills to grab a screwdriver, safely access the hardware, and perform a perfect door closer adjustment. By treating those tiny valves like simple water faucets, you have taken complete control over your space’s comfort and noise levels.
Temperature changes cause hydraulic fluid to thicken in the winter and thin out in the summer, meaning a door might act differently in December than it does in July. To maintain building security and ensure your climate control stays inside where it belongs, you need a consistent routine. Implementing a step by step overhead closer maintenance plan only takes five minutes each season.
Start with this simple 5-item seasonal check-up list for every door in your building to catch problems early:
- Swing the door fully open to 90 degrees and observe the main sweep speed.
- Listen closely to ensure the final latching speed securely clicks into the frame.
- Inspect beneath the metal cover for any shiny, leaking hydraulic oil.
- Perform the “Paper Test” by closing the door on a sheet to verify a tight seal.
- Make tiny 1/8th turns to fine-tune seasonal shifts.
While you are now fully capable of fine-tuning these settings yourself, confidently deciding when to call a professional is just as crucial. If you spot dripping oil or if a valve feels dangerously loose, the internal seals are blown and the plug has essentially been pulled. That is your clear signal to step back and hire an expert for a completely new door closer installation.
Door closer adjustment relies on small, precise tweaks rather than specialized mechanical skills. By routinely checking these valves and hinges, you maintain control over your building’s climate, security, and noise levels. Achieving that satisfying, silent click ensures your hardware operates smoothly for years to come.

Leave a Reply
Want to join the discussion?Feel free to contribute!